More Lessons Learned

Apple Sage Loaf

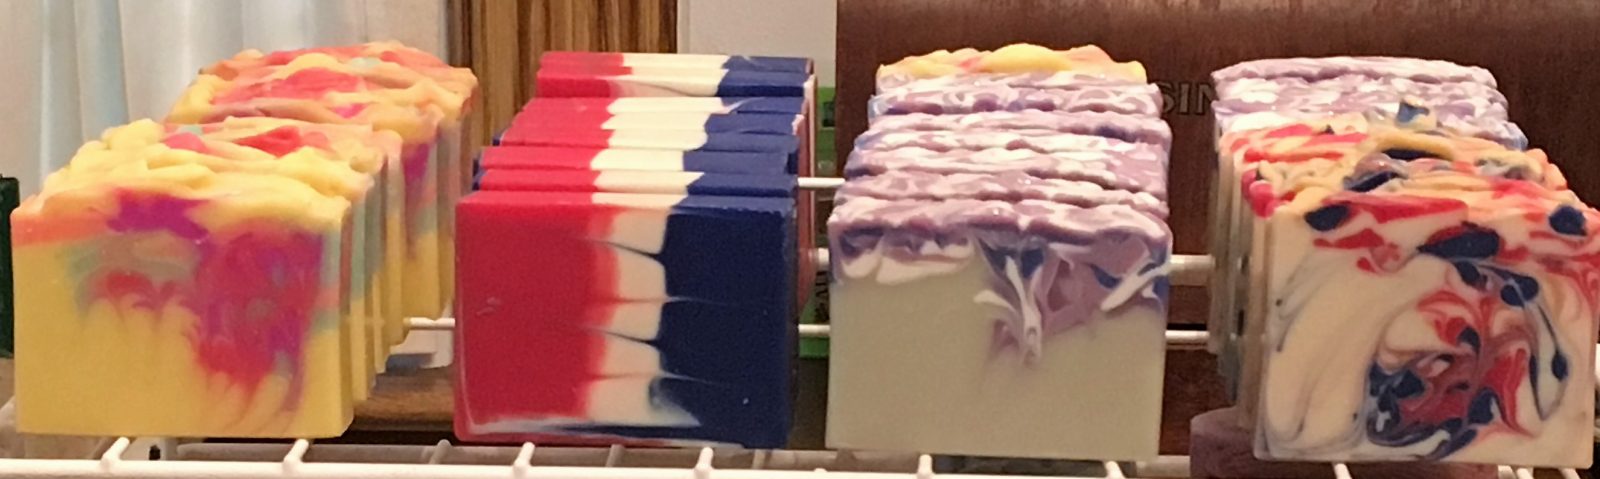
We made another batch of hot-process swirl yesterday and rebatched another cold-process soap that set up on us Tuesday. I did the hot-process swirl that I used to make the Patriot Swirl, only this time I followed the author’s instructions more closely. I used Apple Sage fragrance oil, which is very nice.

Amazingly, I’m not sure the results are better. Took the loaf out of the mold this a.m. and there are many little air bubbles. I used three colors, and when we mixed the titanium dioxide, the soap got noticeably thicker, like frosting. Which is surprising considering this was post cook.

It appears the rebatch (technically called hand milled) of the pear fragrance soap we made Tuesday turned out nicely — a light pink color with spots of darker pink and curls of very light-to-white color.

Hand Milled Pear

The lemongrass soap we made last week still is gummy in the black areas. We’ve determined that we used way too much black oxide, which can make washcloths turn black when using, but won’t stain them. So now I’m checking each color on Brambleberry to ensure we use the correct ratios.

We still can’t understand what’s going wrong with the cold-process setting up. Some fragrance oils are known for accelerating trace, i.e. making the soap get thick too quickly. But pear isn’t supposed to be one of them. However, we’ve never used it in CP, only hot process.

Also, the batch of soap we had to throw away had a new to us FO — Amber Romance, which immediately made the soap seize. There was no way to salvage it.

Almost every time we make soap we learn something even though we’ve been making soap for four years. Of course, there were long periods of time between batches back in the day and last year, when she was gone, we didn’t make soap after February (2016). We’ve made more soap in the past 30 days than ever — eight batches.

Musings Over Bar Size, Etc

Older Label

We spent quite a bit of time yesterday, working on our cigar-band labels, cutting our recent magenta-lavender soap back to size after we glopped rebatched soap on top, and updating the website.

Our labels have evolved over time from adhesive stick-on labels to cigar-band labels that encircled the bar, but the printing was perpendicular to the width of the bar. However, the latter method nearly completely obliterated any view of the bar, which was disappointing when we made a pretty soap.

Somewhere I saw where someone had their soap on shelves and I noticed their cigar-band labels were very small, encircling only the very bottom of the bar, and with the printing parallel with the width of the bar.

New Label

I started making our labels like that, which left most of the bar exposed for viewing. Last night, I made them even smaller.

Frankenstein Bar

We also cut the tops off the magenta-lavender soap. We’d glopped leftover lavender soap on top of the existing bars, but the mistake we made was doing it after we’d already cut the loaf. It was impossible cut through the added soap and match it up with the cuts we’d already made. The result was ugly, misshapen bars straight out of Frankenstein’s laboratory.

Revised Lavender

The basic bar with the top cut off looks much nicer.

I work with the website, while she works more with finessing the soap once it’s out of the mold. However, last night she went to the website and helped me delete a lot of stuff that was outdated, soap we don’t even have in inventory anymore, and a bunch of paracord and crocheted items. Also deleted all the lip balm since it’s getting pretty old, but still retains its scent and vitality.

Making handmade soap is quite an experience. It’s really an art, and like artsy stuff, it isn’t cheap to make. However, most people probably don’t think it makes any sense to pay $5-$7 for a bar of soap when they can get a dozen bars of something labeled “soap” at WalMart for $2.50. (I haven’t priced it, just guessing. And, of course, it’s not “real” soap.)

We’re not good at marketing and very seldom sell soap via the website. We’ve had several friends who bought once and then never returned. Just can’t justify spending that kind of money, I guess. We’ve also tried selling on ebay, but that was a flop, too. Sold soap there once and gave up. Maybe need to try Etsy.

We sell the most soap at the local senior center here in town, where they feature crafts made by seniors. I have no idea who buys our soap; maybe tourists passing through. Trouble is, they take a 25 percent or more cut, but I guess that’s better than selling nothing.

One idea I’ve been tossing around is cutting our bars in half and selling them for $2.50-$3. I wonder if people would be more willing to part with that kind of change rather than forking out $5-$8 for a bigger bar? People have paid $7 for our soap at the senior center, however.

Success After Disaster

Stirring Radiant Plum Oxide

Yesterday we tried again to make the Taiwan Swirl in cold process soap, using Soap Queen’s “Swirl” recipe. We did everything carefully: Mixed the oils and lye water at a cool temperature, stirred/blended just short of trace, split into four pitchers, added colors and Amber Romance fragrance oil and began pouring. And then everything went south.

The soap began setting up and ricing and there was no hope of swirling, let alone pouring the soap. I added water, frantically trying to thin back the soap as she glopped it into the miter box mold. I glopped the leftover into another miter box and we put them in the oven at 170F.

But soon we noticed liquid rising to the top of the soap and draining to the floor of the oven. We stuck a cookie sheet underneath the molds like we should have in the first place.  Finally, we took the  molds out and tried to drain them into the sink. We used paper towels to soak up the liquid. At first we thought it was water because it was so clear, but then we noticed some of it was yellow, the same color as our oils.

Swirling Lemongrass

We left the soap in the oven for several hours, then took it out for a closer look. It was soft, dripping wet and not getting any better. We finally dumped the leftover in a big Ziplock baggie and put the larger loaf in the freezer.

Later, she looked at the leftover soap in the baggie and it actually had hardened and most of the liquid absorbed. The full loaf is still in the freezer. We both felt pretty bad, but she was devastated, her day ruined.

We realized we should have tested the fragrance oil first by making a batch small enough for one bar. Then if it goes south, very little time and product have been lost.

Ready To Cut

That evening, I prepared to make another batch of soap using the new silicone mold and Soap Queen’s swirl recipe sized to fit the mold, but using three colors instead of four.

One of our concerns was that the previous batch hadn’t emulsified (thus the oils leaching out), so we took this batch to a very light trace, split it into three pitchers, then poured the white entirely in the bottom of the mold. Then we took the Radiant Plum Oxide and poured two lines of color just off center, with a line of Black Oxide right down the center.

Then she had the honor of swirling the soap, which she did with a chopstick. As you can see, the results are gratifying. Not exactly as beautiful a Taiwan Swirl like we’ve seen other soap makers do, but at least we’re making progress. We used lemongrass essential oil, which we’ve used and know doesn’t accelerate trace.

Result: Big Bars

Today we cut the soap, only we did it wrong, so got only six bars and they’re too large. Also, we didn’t bang the mold enough while pouring, so there are many tiny bubbles. We should have waited another day or two to cut since it’s still a bit soft even with using sodium lactate.

Lessons learned: 1. Always test a new fragrance oil, and/or research how it behaves. If the FO comes from Brambleberry, their website will tell how it behaves. 2. Add scent at the last possible moment, like when mixing colors. 3. Cut silicone mold in fourths instead of thirds before making crosscut to get a better sized bar, and more bars. (These bars weigh 7-to-8 ounces. Four ounces is preferable.)

So we ended the day on a high, happy note! Yay!

Cutting Soap Quandary

Old Cheese Slicer Cutter

I haven’t been happy lately with the way we’ve been cutting our soap. We’ve been cutting the soap in the miter box mold just like you’d cut a piece of wood, lining up two slots in the sides of the box to slide the blade through.

Over the years, we’ve used a kitchen knife, a little home-made cheese slicer-type cutter we found at Goodwill (like I’m using on our home page), and lately we’ve used a flat blade and crinkle blade on the miter box. We have another cheese slicer-type that broke the first time we used it.

Blade Cutters on Cheese Slicer

Crooked Soap

The trouble with the miter box is that the soap sticks up above the cutting slots, so if one isn’t careful, which I evidently am not, the cut ends up being curved, to bring the blade back in line with the slots.

They make beautiful multiple-wire cutters that cut an entire loaf at once, but most are in the $250-$300 range and I just can’t see paying that for the level of production and experience we’re at. Maybe if we sold more soap we could afford it.

I’ve also seen a nice single-wire cutter on Etsey for about $98 that we might consider. In the meantime, I think we’ll go back to the little old cheese cutter, or the newer cheese cutter if I can find a strong enough wire, like a guitar string or 20-22 gauge piano wire.


Rebatching Sutter’s Gold Rose

Shredded Soap

She wasn’t happy with the way Sutter’s Gold Rose soap turned out after setting up on us, so she decided to rebatch it even though I discouraged her. I knew it would be a lot of work without a guarantee of better results.

She cut the soap into its three colors and and shredded it. Then she put each color into its own crockpot, added water at the rate of 4 oz per  pound and started cooking. When the soap started getting pretty soft, like thick frosting, she added a pipette of Egyptian Rose essential oil, another ounce of water and two teaspoons of yogurt.

I couldn’t tell if the yogurt or additional water made a difference in the fluidity. It certainly wasn’t pourable.

Rebatched

Then, using a narrow flat spatula, she layered the soap into the mold. We banged the mold on the counter many times, trying to eliminate bubbles, but I’m not holding my breath. Hot-process soap tends to have voids, and the rebatched soap behaved much the same as hot process. We’ll see when we unmold it.

At least she’s happy, and that’s what counts. I stayed out of her way, helped as I could and made suggestions when asked. It was her project from the beginning.


Something New

A June 8, 2016, email newspost from Kenna of modernsoapmaking.com just caught my eye. It featured a tutorial by Molly Ellmore of Ridgewaysoapworks.com titled "Ten Tips & Tricks for Swirling Hot Process Soap." modernsoapmaking.com/tips-for-swirling-hot-process-soap

Are you kidding me!? Swirling hot process? Our experience with hot process is we’re lucky to get it in the mold before it sets up. So you can see why Molly got my attention. I believed Molly, but I had to prove it to myself.

I read the tutorial over and over, trying to understand every nuance. I watched her excellent video over and over. Her theory is that adding yogurt to the soap increases fluidity. And keeping everything hot is important to keep the soap from cooling too quickly. So she keeps things warm in a low-temp (170F) oven.

Patriot Swirl

But I made a serious mistake by putting the yogurt into the oils before I added lye water. It should have been added post cook. As Molly said in a kind email to me, “I suggest adding your yogurt after the cook after the soap has cooled to around 180. If you add it hotter than that, the sugars in the yogurt can caramelize and turn your soap a cream/tan color. Also – try putting your soap in the freezer after you put it in the mold. Leave it there for a few hours or overnight. It can really help the soap harden up, even after it has thawed. Be sure to let it thaw before cutting though!!”

Our hot-process soap usually finishes cooking in about 45 minutes. After 1 1/2 hours, the soap still hadn’t cooked. It was about 50 percent amber liquid (caramelized yogurt) and half floating pieces of soap.

We finally gave up, split it into three containers, added the scent/colors and poured it into the mold. I swirled it with the Brambleberry “hanger” wire and ran a chopstick through it like Molly did in the video. I used a new silicone mold we bought just the day before at Joy’s Handcrafters Supply in Milwaukie, OR. handcrafterssupply.com.

I cut the soap today and I think I should have waited a few days. Even though I used sodium lactate, it seems a bit soft in spots, due to the caramelizing, I think. But the swirling turned out beautiful! I’m impressed, and I’m a believer.

The recipe I used was new to me: Soap Queen’s Swirl Quick Mix, which is designed for cold process. I should have stuck with one of our tried-and-true recipes. Which is what I intend to do, only put the yogurt in right next time.

Such fun to try new things! And thanks to people like Kenna, Molly, Anne-Marie and others who share their talent and experience with us rookies!

Having Fun

Sutter’s Gold


Getting in gear is an understatement. We’ve added 64 bars of soap to our inventory since Jan 2. We made 12 bars of cold process with rose scent Jan 2 called Sutter’s Gold after a favorite rose. However, she isn’t happy with it and wants to rebatch it. It was supposed to be a triple-color swirl, but started setting up before we could pour it, so we glopped it into the mold, sort of like how hot process sometimes turns out.

Adding Color

Next, we made what we call Yvonne’s Hot Process, after one of our instructors. It’s such a large batch that we split it in two and she made blue marble manly scent out of her half and I made magenta lavender out of mine.

Green Goat


Yesterday, she made her green goat recipe hot process for the first time to try to maintain the green color from spirulina. Usually, when doing it cold process, the lye turns the green spirulina brown after a few days. People probably have wondered why she calls it green goat. By adding the spirulina after the soap cooks, there’s a better chance it will stay green because the lye and oils have saponified. And so far it has.

Loading Mold

Then I made a batch of hot process red-white-and-blue with spearmint scent. More on that in a separate blog entry.

Getting Back in Gear

Manly Blue Marble and Magenta Lavender


I apologize for letting the website languish for the past year. For much of that time, “she” has been gone, caring for aging parents, so it’s been just me, my faithful sidekick Kadie Bear, Abbie Cat Kid, our late curmudgeon cat Fritz and three hens.

We continue to sell soap at the local senior center and to a few faithful friends, so the inventory is pretty low, with many soaps out of stock.

However, “she” came back and we started making soap last week. We made a batch of cold process soap we called “Sutter’s Gold” after one of our favorite roses. However, it started seizing before we could even get it into the mold. So much for the swirl we’d planned. No idea what went wrong. We did the CP/OP (cold process/oven process), so it’s pretty much ready to go. It’s scented with Egyptian Geranium Rose EO.

Two days ago we made a big batch of hot process soap, with half of it being the blue marble manly scent, which is pretty popular with several people and has a long-lasting scent. We’re using a nearly 2-year-old used-up bar in a bathroom and it still smells as strong as the day we made it.

The other half of the batch is scented with lavender and has a beautiful light magenta color.

That’s nearly 10 pounds of soap, with 30 new bars, not counting the dozen Sutter’s Gold bars.

We’ll be making more soap in the days ahead, with most of it being hot process or CP/OP, so it won’t need to cure for six weeks. I’ll try to get it photographed and up here on the website as soon as possible.

I wrote this several hours ago only to have it disappear each time I tried to post it. Finally got some help from ehost tech support and have been working the past couple hours trying to restore things. A couple blogs disappeared, but it’s probably no great loss.

Doubt if anyone reads this blather, but if you do, thanks for reading.

Website A Full-Time Job

Learning how to create and manage a website properly is pretty mind-blowing. It appears to me that, done correctly, it could be a pretty full-time endeavor. I look at websites such as brambleberry.com, soapqueen.com, and ModernSoapmaking.com and I’m overwhelmed.

The creativity and energy these people have is just amazing! Constantly updating, adding new products and sending emails and e-newsletters. Don’t know how they do it. Makes me wonder if we’re really cut out for this kind of thing?

Obviously, it takes more than just creating a website, letting it sit there and thinking it will do all the work. There must be an energetic, live person behind the scenes pulling the strings!

Now just where are we going to find that person!?